Sitewide options
This is part of the Stockashop Manual. It shows you how to manage sitewide product options which can be used on all your products, across your whole site. Unlike normal product options, sitewide options can use images, and can have their own prices. This is an advanced feature which you must request to have turned on.
Product options
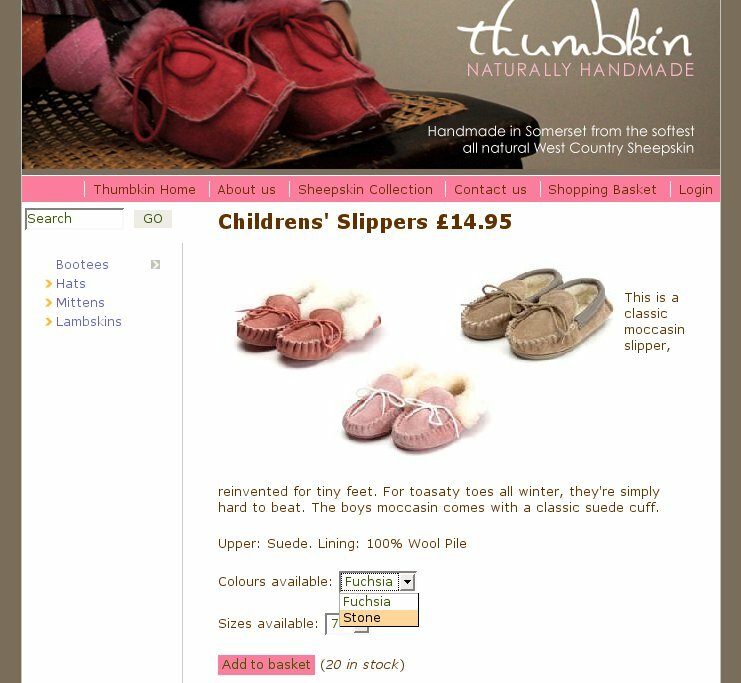 First a brief review of regular product options, taken from the product options manual. These are variations applied to your base product, like "colour" or "size". For example, if you sell tshirts, some of your products might be available in yellow, blue and green, and others in black, blue and purple. These options appear in drop downs after the product description, above the "Buy now" button as in the example on the right. These options are set up on a product by product basis when you edit the product.
What sitewide options look like
 Sitewide options on the other hand, are set up separately, and can be applied to any and all products on your site. On the right is an example of sitewide options in action. In this case, it is hair colour.
The options are presented in a dropdown list (for non Javascript browsers) and as images, which you can scroll through horizontally. Clicking on the images or descriptions? below them will automatically select the correct option from the drop down.
When you click "Buy now", the sitewide product option will appear in the shopping basket with any other regular product options.
Managing sitewide product options
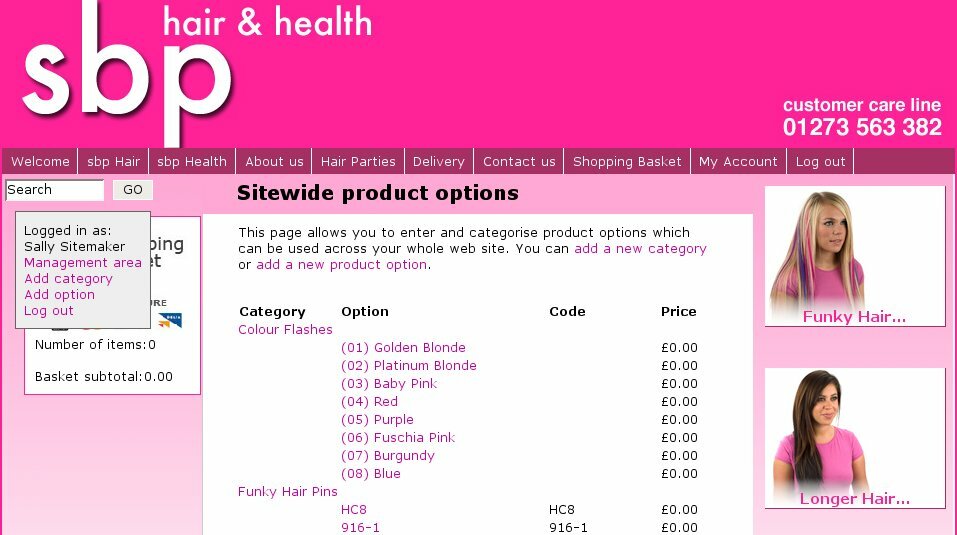 From your management area, click "manage sitewide product options". This brings you to the "Sitewide product options" page which shows you all of your categories and options. In the example on the right, you can see two categories for "Colour Flashes" and "Funky Hair Pins" with various options, with their codes and prices. From this page you can add new sitewide option categories and new sitewide options. Each is described below.
Sitewide option categories
 Sitewide options are divided into categories. Some examples of real Stockashop sitewide option categories (drawn sort of randomly from a variety of sites) include: hair colour, sandwich filling, human hair colour, sauces, salad, 1st eyeshadow, feet, bead colour 1, logo, 2nd choice of lipstick, veneer and plexi glass. Categories can also be heirarchical, so you can have different types of logos (animals, music, sports, etc) within the main logo category.
Each top level category will appear on your product pages (and on the product editing page - see below) separately, with its own set of images. In the example on the right, there are main categories for bread, cheese/vegetarian, meat or fish, sauces and sprinkles. The drop down menus have been hidden using CSS, so you only see the images.
When you add or edit a sitewide option category, you are presented with the following fields:
Parent category: If you would like heirarchical categories, then choose the parent category here. The next section of this manual describes how heirarchical categories work.
Category name: This is the name of the sitewide option category, such as "hair colour" or "sandwich filling".
Required: This determines whether the customer is forced to choose at least one of the options presented before buying the product. (This only applies to top level categories.)
Maximum selections: You can allow the customer to choose more than one of the options. This determines the maximum number of options they can choose. It defaults to one. For example, if you are selling sandwiches, you may want the customer to choose up to 5 different fillings. (This also only applies to top level categories.)
Heirarchical categories
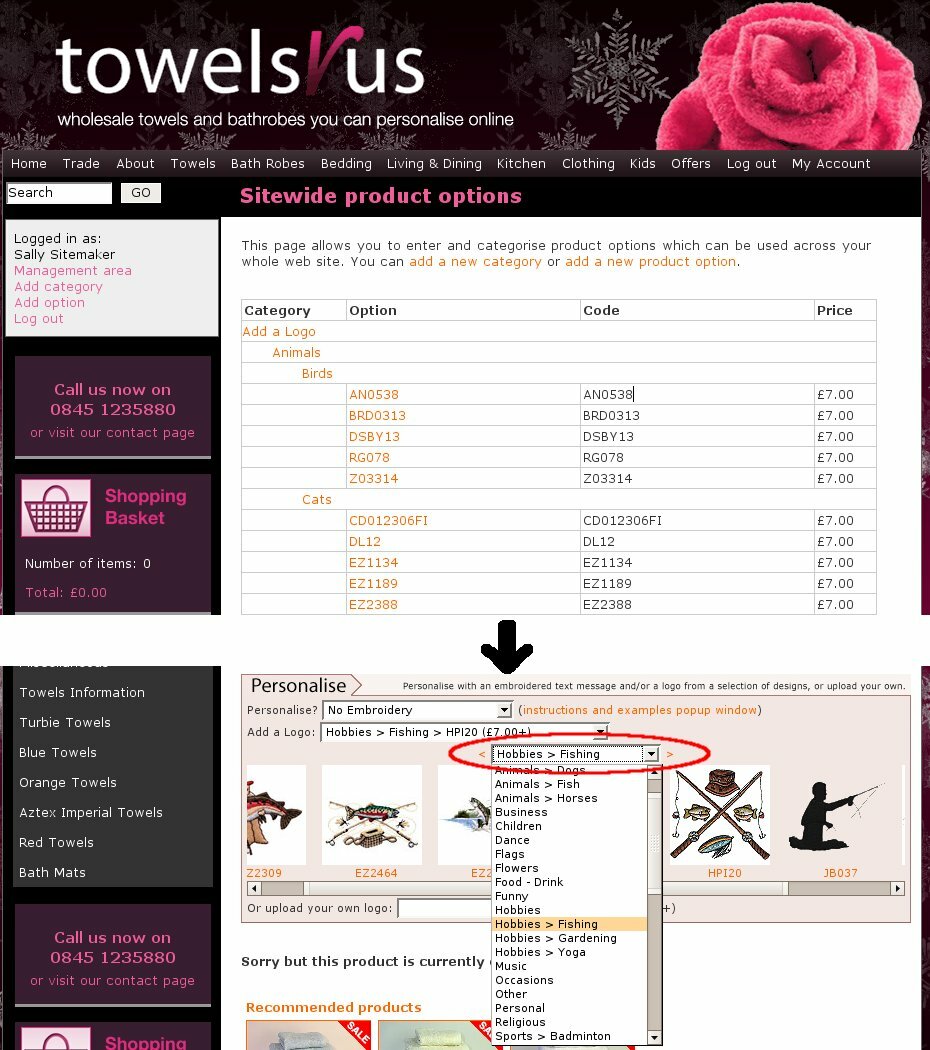 If you add subcategories under a main category, then an extra dropdown will appear above the scrollable images. When you change this dropdown to a different subcategory (or use the left and right arrows), a new set of images will be loaded in.
Note that in the example on the right, only the "Add a logo" option is a sitewide option. The first "Personslise?" option is a regular product option, and the "Or upload your own logo" is a file upload option. They are grouped together in a box with clever usage of CSS and Javascript (which sets an appropriate CSS class on the
tag of the page).Note that except for the first category, images are only loaded (via AJAX) when needed, which makes the process faster and cuts down on bandwidth usage. This also provides a way for you to have hundreds of options with images without making the page any slower to load.
Sitewide product options
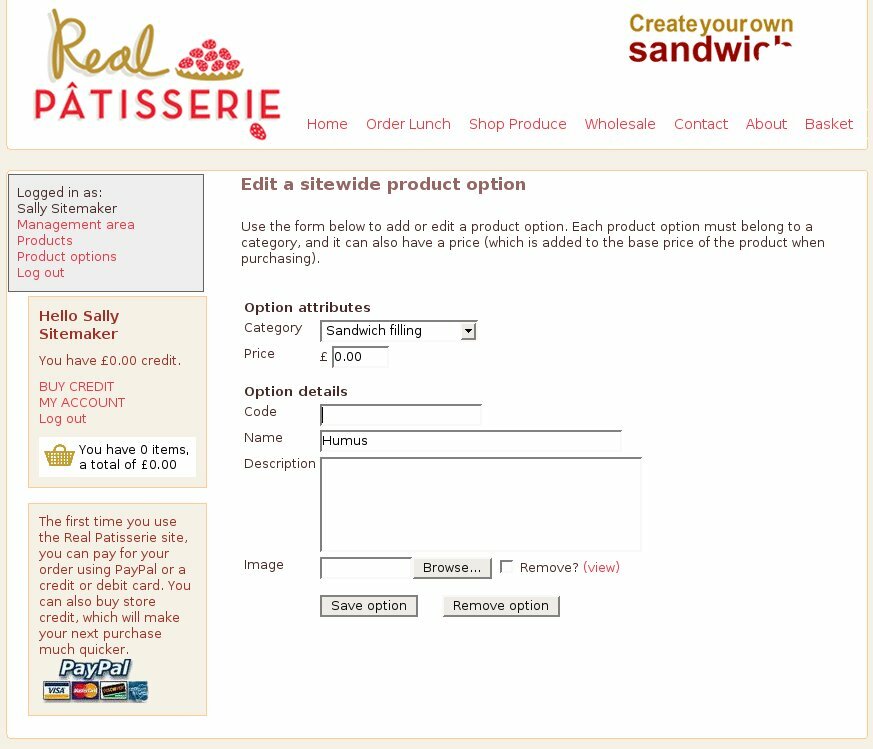 Each logo, hair colour, type of bread and sauce above is a "sitewide product option" sitting within a "sitewide product option category". When you add or edit a sitewide product option in the management area, you are presented with a page like the one on the right, where you can fill in the following fields:
Category: You must choose a category for each sitewide product option. So you need to setup at least one category above first.
Price: If you would like this particular option to incur an additional cost, enter the price here. The amount will be added to the product's base price.
Code: If you have a separate product code related to this option, enter it here.
Name: The name of this option, such as "brown" if the category is hair colour or "lettuce" for a sandwich filling.
Description: A description of this option.
Image: A picture of this option, which will be shown in a scrollable, clickable list.
Assigning to a product
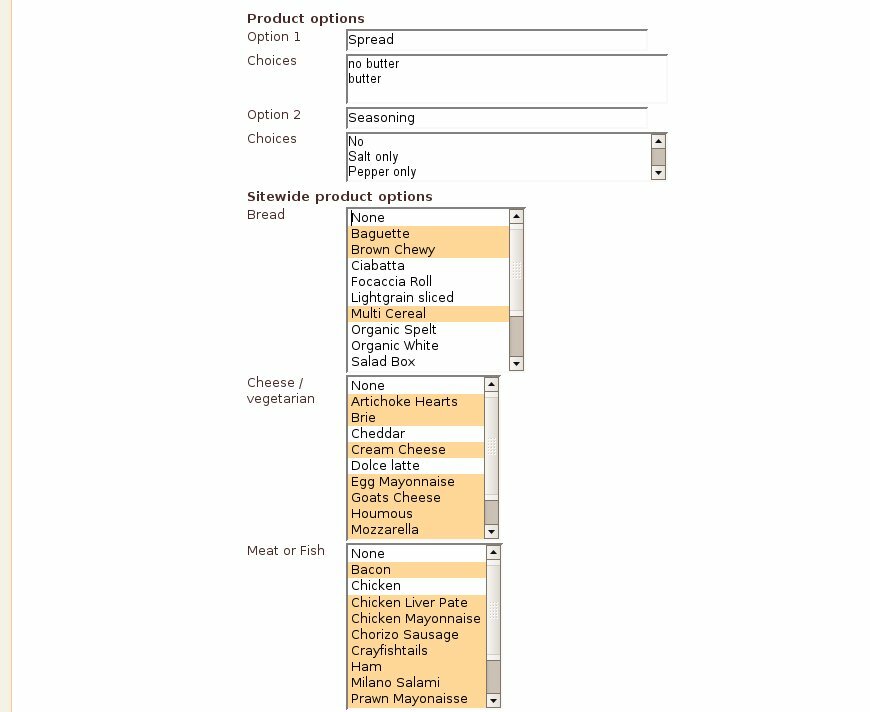 There is an extra step I haven't mentioned yet. After you've entered your categories and options above, they don't automatically start appearing on your products. You first have to edit your products and decide which of the sitewide options (if any) apply to each product.
When editing a product, the "sitewide options" appear under the "product options". The example on the right shows how you can select the different options available for the sandwich making example above. As with other multiple dropdowns, use the Shift and Ctrl keys to select more than one option. If you don't select anything from one of the lists, the option will not appear on the product page at all. The example shows the product optiosn as well for reference.
In the shopping basket
 Stockashops with the sitewide option feature have slightly different looking shopping baskets than other sites. As sites with sitewide options tend to have many more additional options shown with each item, they are shown indented, with one option on each line. On normal Stockashops, these options are all shown in parantheses after the item name. The example on the right shows what this looks like.
LOGIN AREA
CONTACT US TODAY?


